


As the chill of winter approaches, one accessory that becomes a necessity is a neck warmer. But why buy one when you can create your own customized fleece neck warmer? In this article, we will guide you on how to make a fleece neck gaiter, a versatile piece that not only keeps you warm but also adds a touch of personal style to your winter wardrobe. We will be using a simple straight stitch method that even sewing beginners can master. By the end of this tutorial, you'll have a cozy, well-crafted fleece neck warmer that you made with your own two hands. So let's dive into the world of DIY and start creating your very own fleece neck gaiter.
Key Takeaways:
- Learn the basic steps on how to make a neck gaiter at home.
- Discover tips for choosing the right fabric and tools for your DIY neck gaiter.
- Understand how to customize your neck gaiter for different uses and styles.
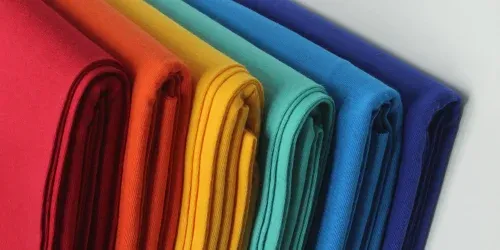
Choosing Your Fabric
When deciding how to make a neck gaiter, selecting the right fabric is crucial. You want a material that is stretchy, comfortable against the skin, and suitable for the intended use. For cold weather, fleece or wool can provide warmth, while lighter, breathable fabrics like polyester blends are ideal for warmer climates or physical activities. Always opt for a fabric with at least a 50% stretch to ensure a snug, comfortable fit.
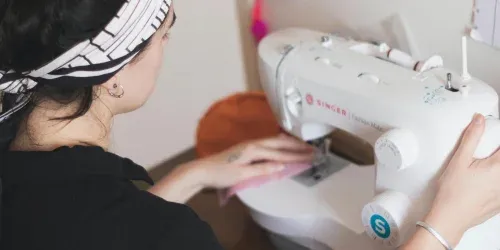
Gathering Your Tools
Before you start, make sure you have all the necessary tools on hand. You'll need a sewing machine, thread, scissors, pins, a measuring tape, and a fabric marker or chalk. If you're working with stretchy materials, a ballpoint sewing needle is recommended to prevent snagging the fabric. A serger is optional but can give your neck gaiter a professional finish.
Measuring and Cutting
To begin, measure the circumference of your head or the head of the person who will wear the neck gaiter. Add an inch to this measurement for seam allowance. The standard height for a neck gaiter is about 20 inches, but you can adjust this based on personal preference. Once you have your measurements, cut a rectangle of fabric to these dimensions.
Sewing the Edges
Fold the fabric in half lengthwise with the right sides facing each other. Pin along the edge to hold the fabric in place. Sew along the pinned edge using a stretch stitch or a zigzag stitch to maintain the fabric's elasticity. Leave the ends open. This will create a tube shape, which is the base of your neck gaiter.
Hemming the Ends
Turn the tube right side out. Hem both open ends of the tube by folding the edge inward about half an inch. Pin the hem in place and sew around the circumference using a stretch stitch. This will give your neck gaiter a clean, finished look and prevent the fabric from fraying.
Adding Custom Features
Consider adding custom features to your neck gaiter for additional functionality. For example, you can sew in a drawstring at one end to allow for an adjustable fit, or incorporate a pocket for a filter if you're using the gaiter as a face covering. Be creative and tailor your neck gaiter to your specific needs.
Choosing a Pattern or Design
Personalize your neck gaiter by selecting a fabric with a pattern or design that reflects your style. If you're feeling adventurous, you can even create a patchwork design by sewing together different fabric pieces before constructing the gaiter. Remember to consider the fabric's stretch when aligning patterns.
Care and Maintenance
To keep your DIY neck gaiter in top condition, follow proper care instructions based on the fabric you've chosen. Most neck gaiters can be machine washed on a gentle cycle and air-dried. Avoid using fabric softeners or bleach, as these can break down the material's elasticity over time.
Styling Your Neck Gaiter
Neck gaiters are not only practical but also a stylish accessory. Wear it as a headband, scarf, or even a wristband. Experiment with different ways to fold or twist your neck gaiter to create new looks. The beauty of a DIY neck gaiter is that it's entirely unique to you.

Troubleshooting Common Issues
If you encounter issues while sewing, such as the fabric bunching up or the stitches skipping, check your sewing machine settings. Ensure you're using the correct needle and stitch type for your fabric. If the neck gaiter feels too tight or too loose, adjust the measurements accordingly and try again.
Expanding Your Skills
Once you've mastered how to make a neck gaiter, consider experimenting with different fabrics and designs. You can also explore advanced techniques like adding lining for extra warmth or incorporating reflective materials for visibility. The possibilities are endless, and each project helps you hone your sewing skills.
Summary
Making a neck gaiter is a simple and enjoyable project that allows for creativity and customization. By choosing the right fabric, gathering your tools, and following the steps outlined, you can create a functional and fashionable accessory. Remember to personalize your neck gaiter with custom features and care for it properly to ensure longevity.

FAQs
What type of fabric is best for a neck gaiter?
The best fabric for a neck gaiter is one that is stretchy, comfortable, and suitable for the intended use. Fleece or wool is great for cold weather, while polyester blends are better for warmer conditions or physical activities.
Can I make a neck gaiter without a sewing machine?
While a sewing machine makes the process easier and quicker, you can hand-sew a neck gaiter using a needle and thread. Just be sure to use a stretch stitch to maintain the fabric's elasticity.
How do I adjust the size of my neck gaiter if it doesn't fit?
If your neck gaiter is too tight or too loose, re-measure the circumference of your head and adjust the fabric dimensions accordingly. Remember to include seam allowance in your measurements.
Related Articles: