


Key Takeaways:
- Learn the step-by-step process to create your own fleece neck gaiter.
- Discover essential tips for selecting the right fleece fabric and tools.
- Understand how to finish your neck warmer with professional-looking stitches.

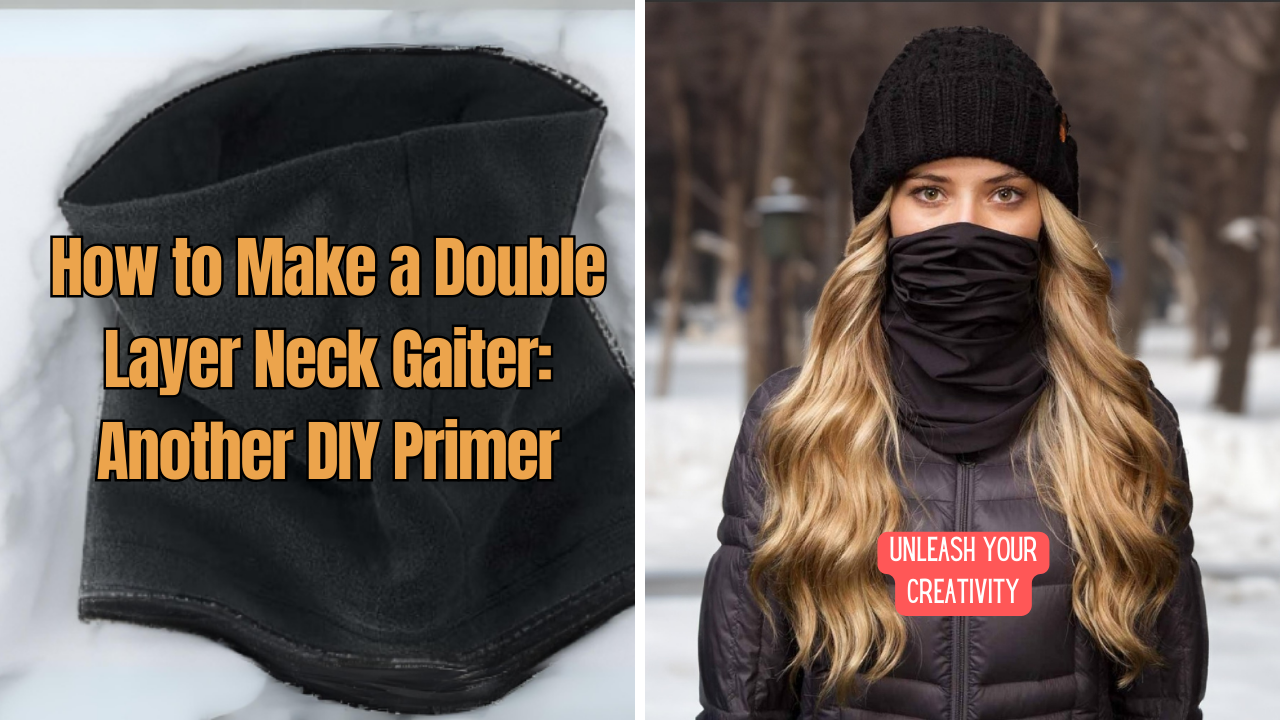
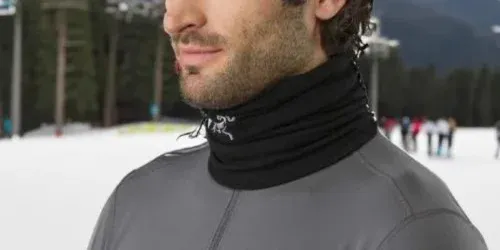
Fleece neck gaiters are a staple for cold weather, offering warmth and comfort without the bulk of a scarf. Whether you're an experienced crafter or new to sewing, making a fleece neck gaiter is an easy sewing project that yields great gifts and personal accessories. This article will guide you through the process of creating a fleece neck warmer, from selecting your materials to the final stitch.
Choosing Your Fleece Fabric
When it comes to making a fleece neck gaiter, selecting the right fleece fabric is crucial. Look for a soft, double-layer fleece that provides insulation while being breathable. The fabric should have a bit of stretch to ensure a snug fit around your neck. Remember, the quality of your fleece neck warmer starts with the quality of the fleece fabric you choose.

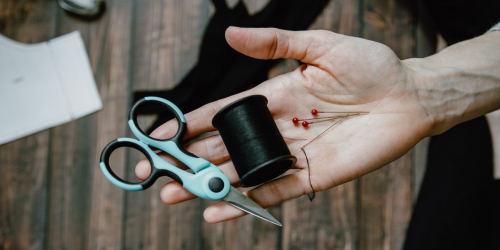
Gathering Your Sewing Supplies
Before you start sewing, make sure you have all the necessary tools. You'll need a sewing machine set up with a straight stitch, a rotary cutter or scissors, a measuring tape, pins or clips, and a safety pin. A hand sewing needle and thread will also come in handy for finishing touches. Ensure your tools are in good condition to make your sewing project run smoothly.
Cutting the Fabric
Begin by measuring and cutting your fleece fabric. For an adult-sized neck gaiter, cut a simple rectangle measuring approximately 20 inches in length and 10 inches in width. This will create a long tube once sewn. Use your rotary cutter or scissors to trim the fleece, ensuring the long edges are straight and even.

Sewing the Long Edges
Place the right sides of the fleece fabric together, aligning the long edges. Pin or clip them in place. Using your sewing machine, sew along the long edge with a straight stitch, maintaining a seam allowance of about half an inch. This will form the main tube of your fleece neck gaiter.
Creating the Vertical Seam
Once you have sewn the long edges together, turn the tube right side out. You'll now have a long tube with the right side of the fleece fabric on the outside. Fold the tube in half, aligning the raw edges of the short sides. Pin or clip these edges together and sew, creating a vertical seam that will be hidden when the gaiter is worn.
Hand Stitching the Final Touches
For a professional finish, hand stitch any openings or raw edges that remain. A ladder stitch or invisible stitch works well for this purpose. Hand sewing gives you control over the final look of your fleece neck gaiter, ensuring that the seams are secure and the edges are neat.
Customizing Your Fleece Neck Gaiter for Different Weather Conditions
When you're learning how to make a fleece neck gaiter, consider the varying weather conditions you might encounter. For brisk autumn days, a single layer of fleece fabric might suffice, keeping the chill at bay without overheating. However, as the mercury dips further, you might want to opt for a double layer fleece neck warmer. This involves cutting two identical pieces of fleece and sewing them together along the long edges before proceeding with the rest of the steps. The double layer not only traps more heat but also gives you the chance to mix and match colors or patterns for a reversible accessory.
In extremely cold weather, you can modify your fleece neck gaiter to cover more of your face by increasing the length of the fabric cut. This longer tube can be pulled up over the nose or even over the ears for added warmth. Remember to account for the extra fabric when measuring your fleece. A stretch stitch or a zigzag stitch can be used when sewing the long edges together to maintain the fleece's elasticity, ensuring that the gaiter can comfortably stretch over your head and stay snug against your face.
Embracing Versatility: Adapting Your Fleece Neck Gaiter for Various Activities
Have you ever considered how to make a fleece neck gaiter that's not just warm but also versatile? Imagine a fleece neck warmer that transitions smoothly from a brisk morning jog to a serene evening walk. The key is in the design. By opting for a double layer of fleece fabric, you create an adjustable neck warmer that can be folded in half for extra warmth or stretched out for a lighter feel. This adaptability makes your DIY neck gaiter an indispensable accessory for outdoor enthusiasts.
Now, let's talk about tailoring your fleece neck gaiter for specific activities. For those who enjoy winter sports, incorporating a moisture-wicking lining can be a game-changer. This addition helps to keep the skin dry and warm, even during intense activities. For the avid cyclist or runner, adding reflective strips can enhance visibility during those early morning or late evening sessions. By considering the demands of your favorite activities, you can make a fleece neck gaiter that's not just a piece of clothing but a functional tool that supports your lifestyle.
The Joy of Crafting: Making Fleece Neck Gaiters as Gifts
Embarking on an easy sewing project like creating fleece neck gaiters can be more than just a way to stay warm; it can be a heartfelt gesture. Hand stitching a fleece neck warmer for a friend or family member infuses the gift with personal significance. Imagine the delight on your loved ones' faces when they receive a hand-sewn neck gaiter, tailored to their taste and in their favorite color. It's a thoughtful present that combines practicality with a touch of warmth, both literal and figurative.
Moreover, fleece neck gaiters make great gifts for kids too. With simple rectangles of soft fleece fabric, you can craft a cozy and comfortable neck warmer that they'll love to wear. Add some fun by choosing patterns with their favorite characters or bright, playful colors. The simplicity of the project means you can involve the kids in the making process, teaching them basic sewing skills and nurturing their creativity. It's a wonderful way to spend quality time together while preparing for the cold weather ahead.
Integrating Additional Functional Features into Your Neck Gaiter
Beyond the basic design, there are several enhancements you can make to your DIY fleece neck gaiter to increase its functionality. For instance, adding a drawstring at the top edge can transform your neck warmer into a snug beanie or a face mask with just a pull. To do this, fold in half an inch of the fleece at one end to create a casing, leaving a small opening to thread through a drawstring using a safety pin. This simple addition allows for an adjustable fit that can adapt to various needs and preferences.
Another practical feature is to sew in a lining of a different material, such as a moisture-wicking fabric, which can be particularly useful for active individuals. This lining can help manage perspiration while still keeping you warm. To attach the lining, cut a piece of the lining fabric to match the size of your fleece fabric cut, and sew the right sides together along the long edges. Then, turn the tube right side out and proceed with the steps to complete your neck gaiter. This creates a multifunctional piece that's not only warm but also comfortable to wear during physical activities.
Adding a Personal Touch
Personalize your fleece neck warmer by adding embellishments or using patterned fleece. You can also make a smaller size for kids or adjust the length for different styles of wear. This simple project allows for creativity, so feel free to experiment with colors and designs.
Care and Maintenance
To keep your fleece neck gaiter looking and feeling great, wash it in cold water and avoid using fabric softeners. Tumble dry on low heat or air dry. Proper care will ensure your neck warmer stays soft and warm for many winters to come.

Summary
Making a fleece neck gaiter is a fun and easy sewing project that results in a practical and cozy accessory for cold weather. By following these straightforward steps and using the right materials and tools, you can create custom neck warmers that are perfect for keeping you warm all winter long.
FAQs
What is the best type of fleece to use for a neck gaiter?
The best type of fleece for a neck gaiter is a soft, double-layer fleece with a bit of stretch. This ensures warmth, comfort, and a snug fit.
Can I hand sew the entire neck gaiter if I don't have a sewing machine?
Yes, you can hand sew the neck gaiter using a backstitch for the long seams and a ladder stitch for closing any openings. It will take longer, but it's entirely possible.
How do I adjust the size of the neck gaiter for a child?
To adjust the size for a child, measure the child's head circumference and reduce the length of the fleece fabric accordingly. The width can also be adjusted for a smaller fit.
Related Articles: